


Tone
-
Regular price
-
$23.99
-
Regular price
-
-
Sale price
-
$23.99
- Regular price
-
$23.99 - Regular price
-
- Sale price
-
$23.99
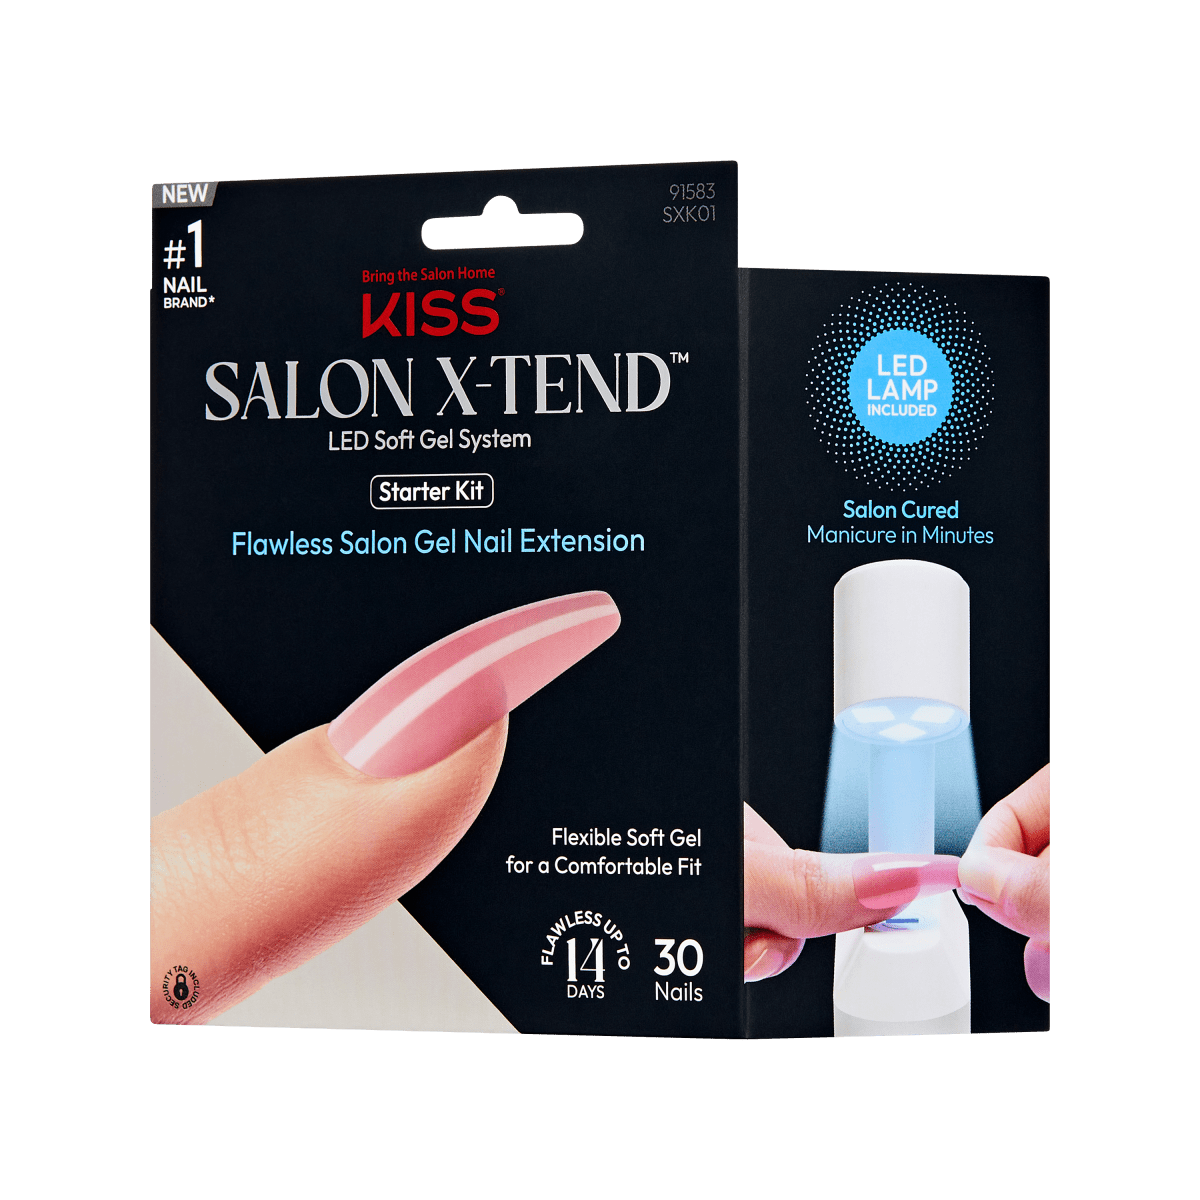
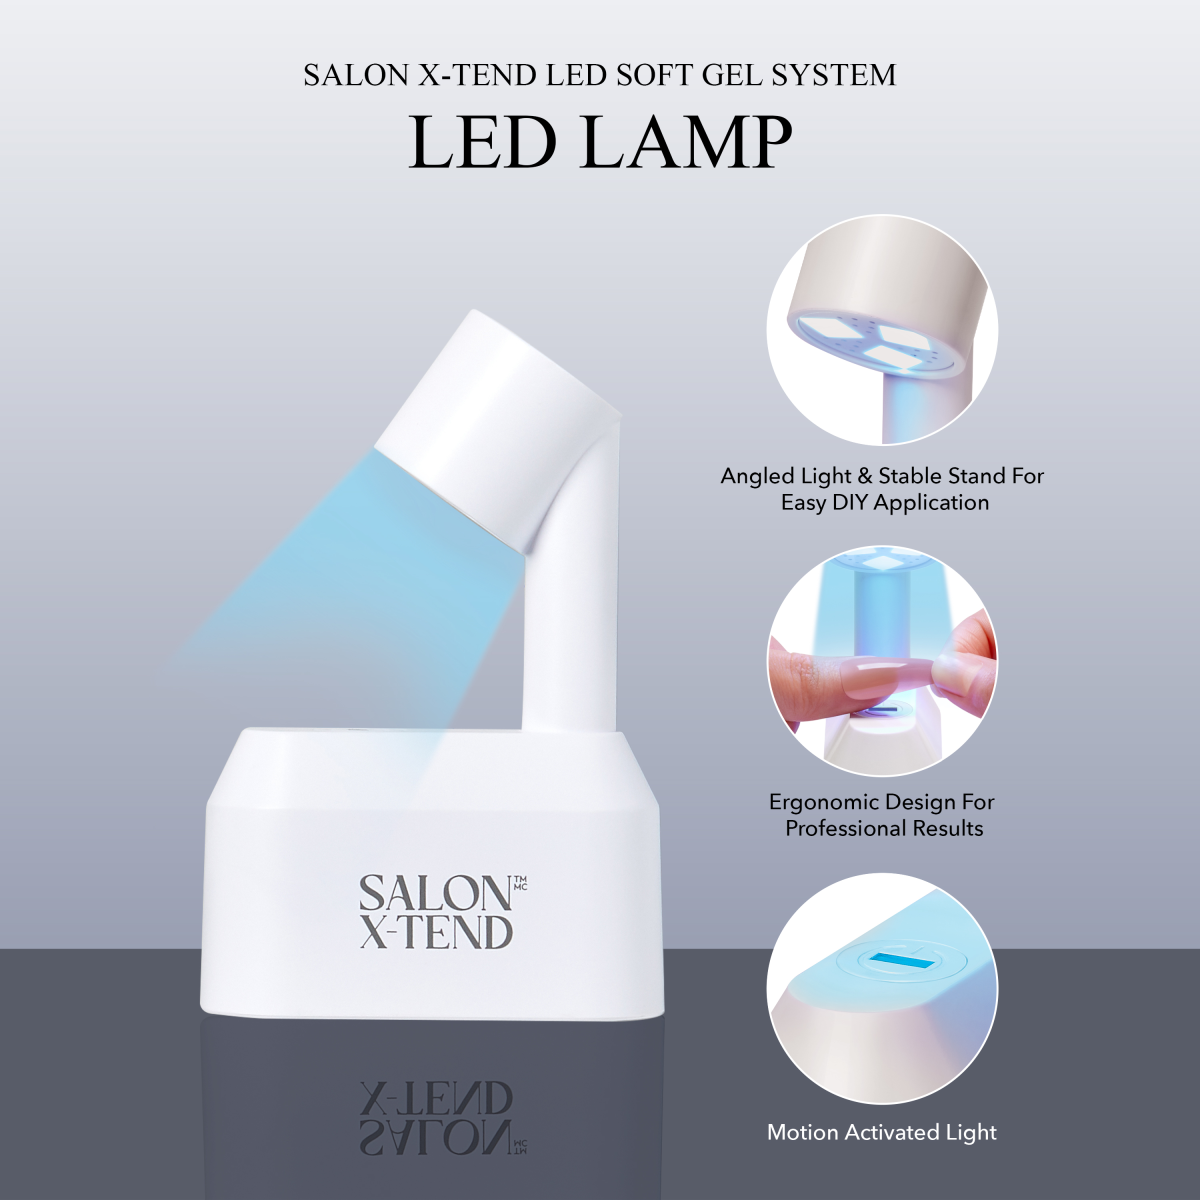
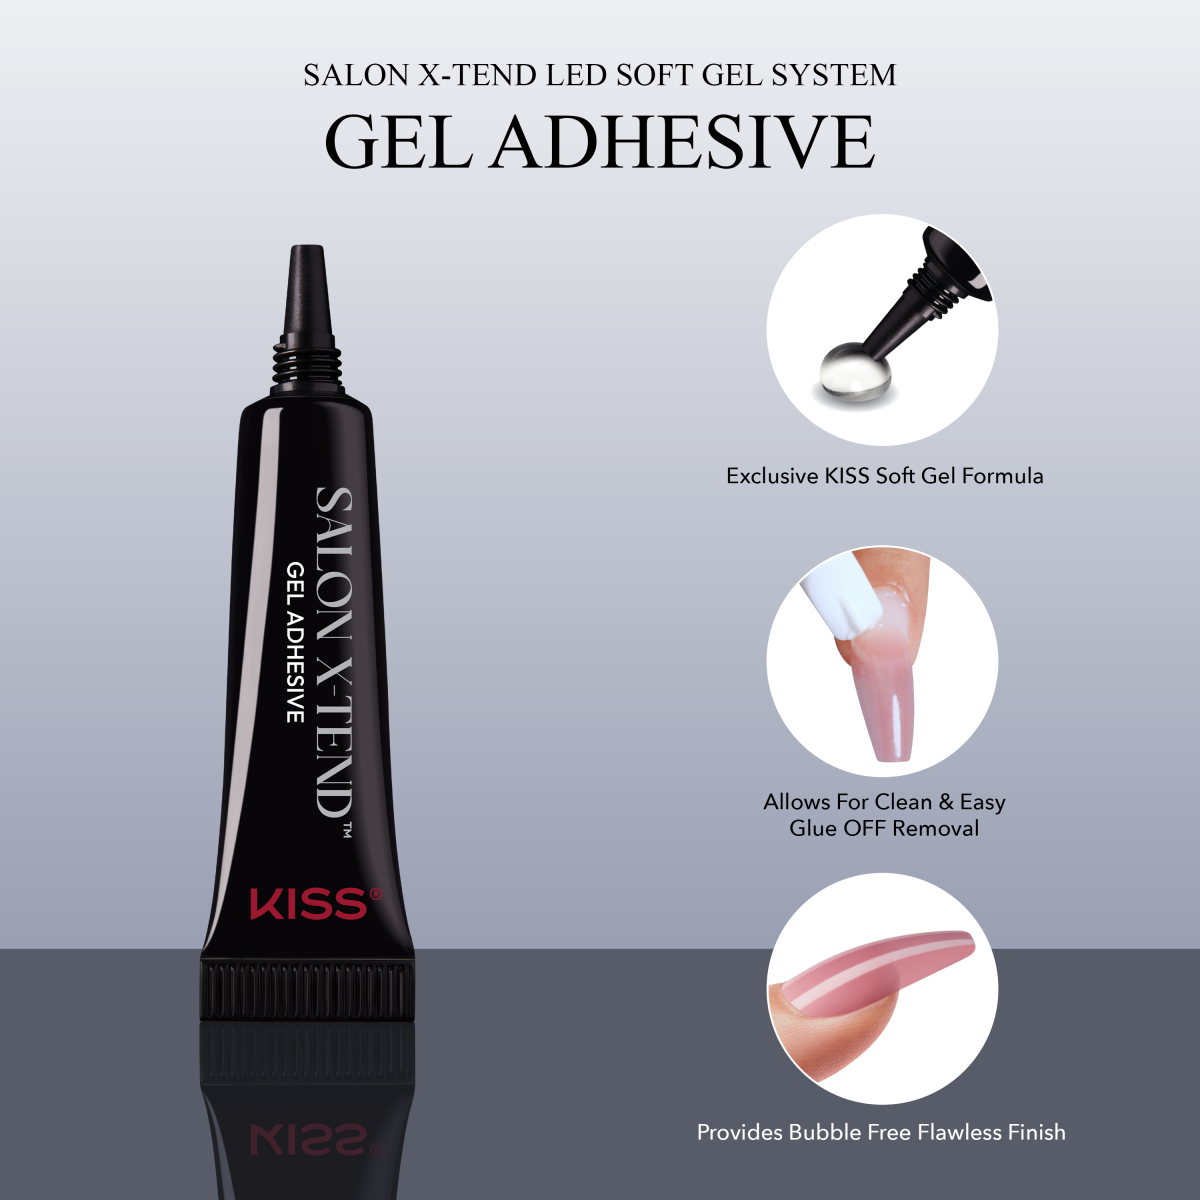
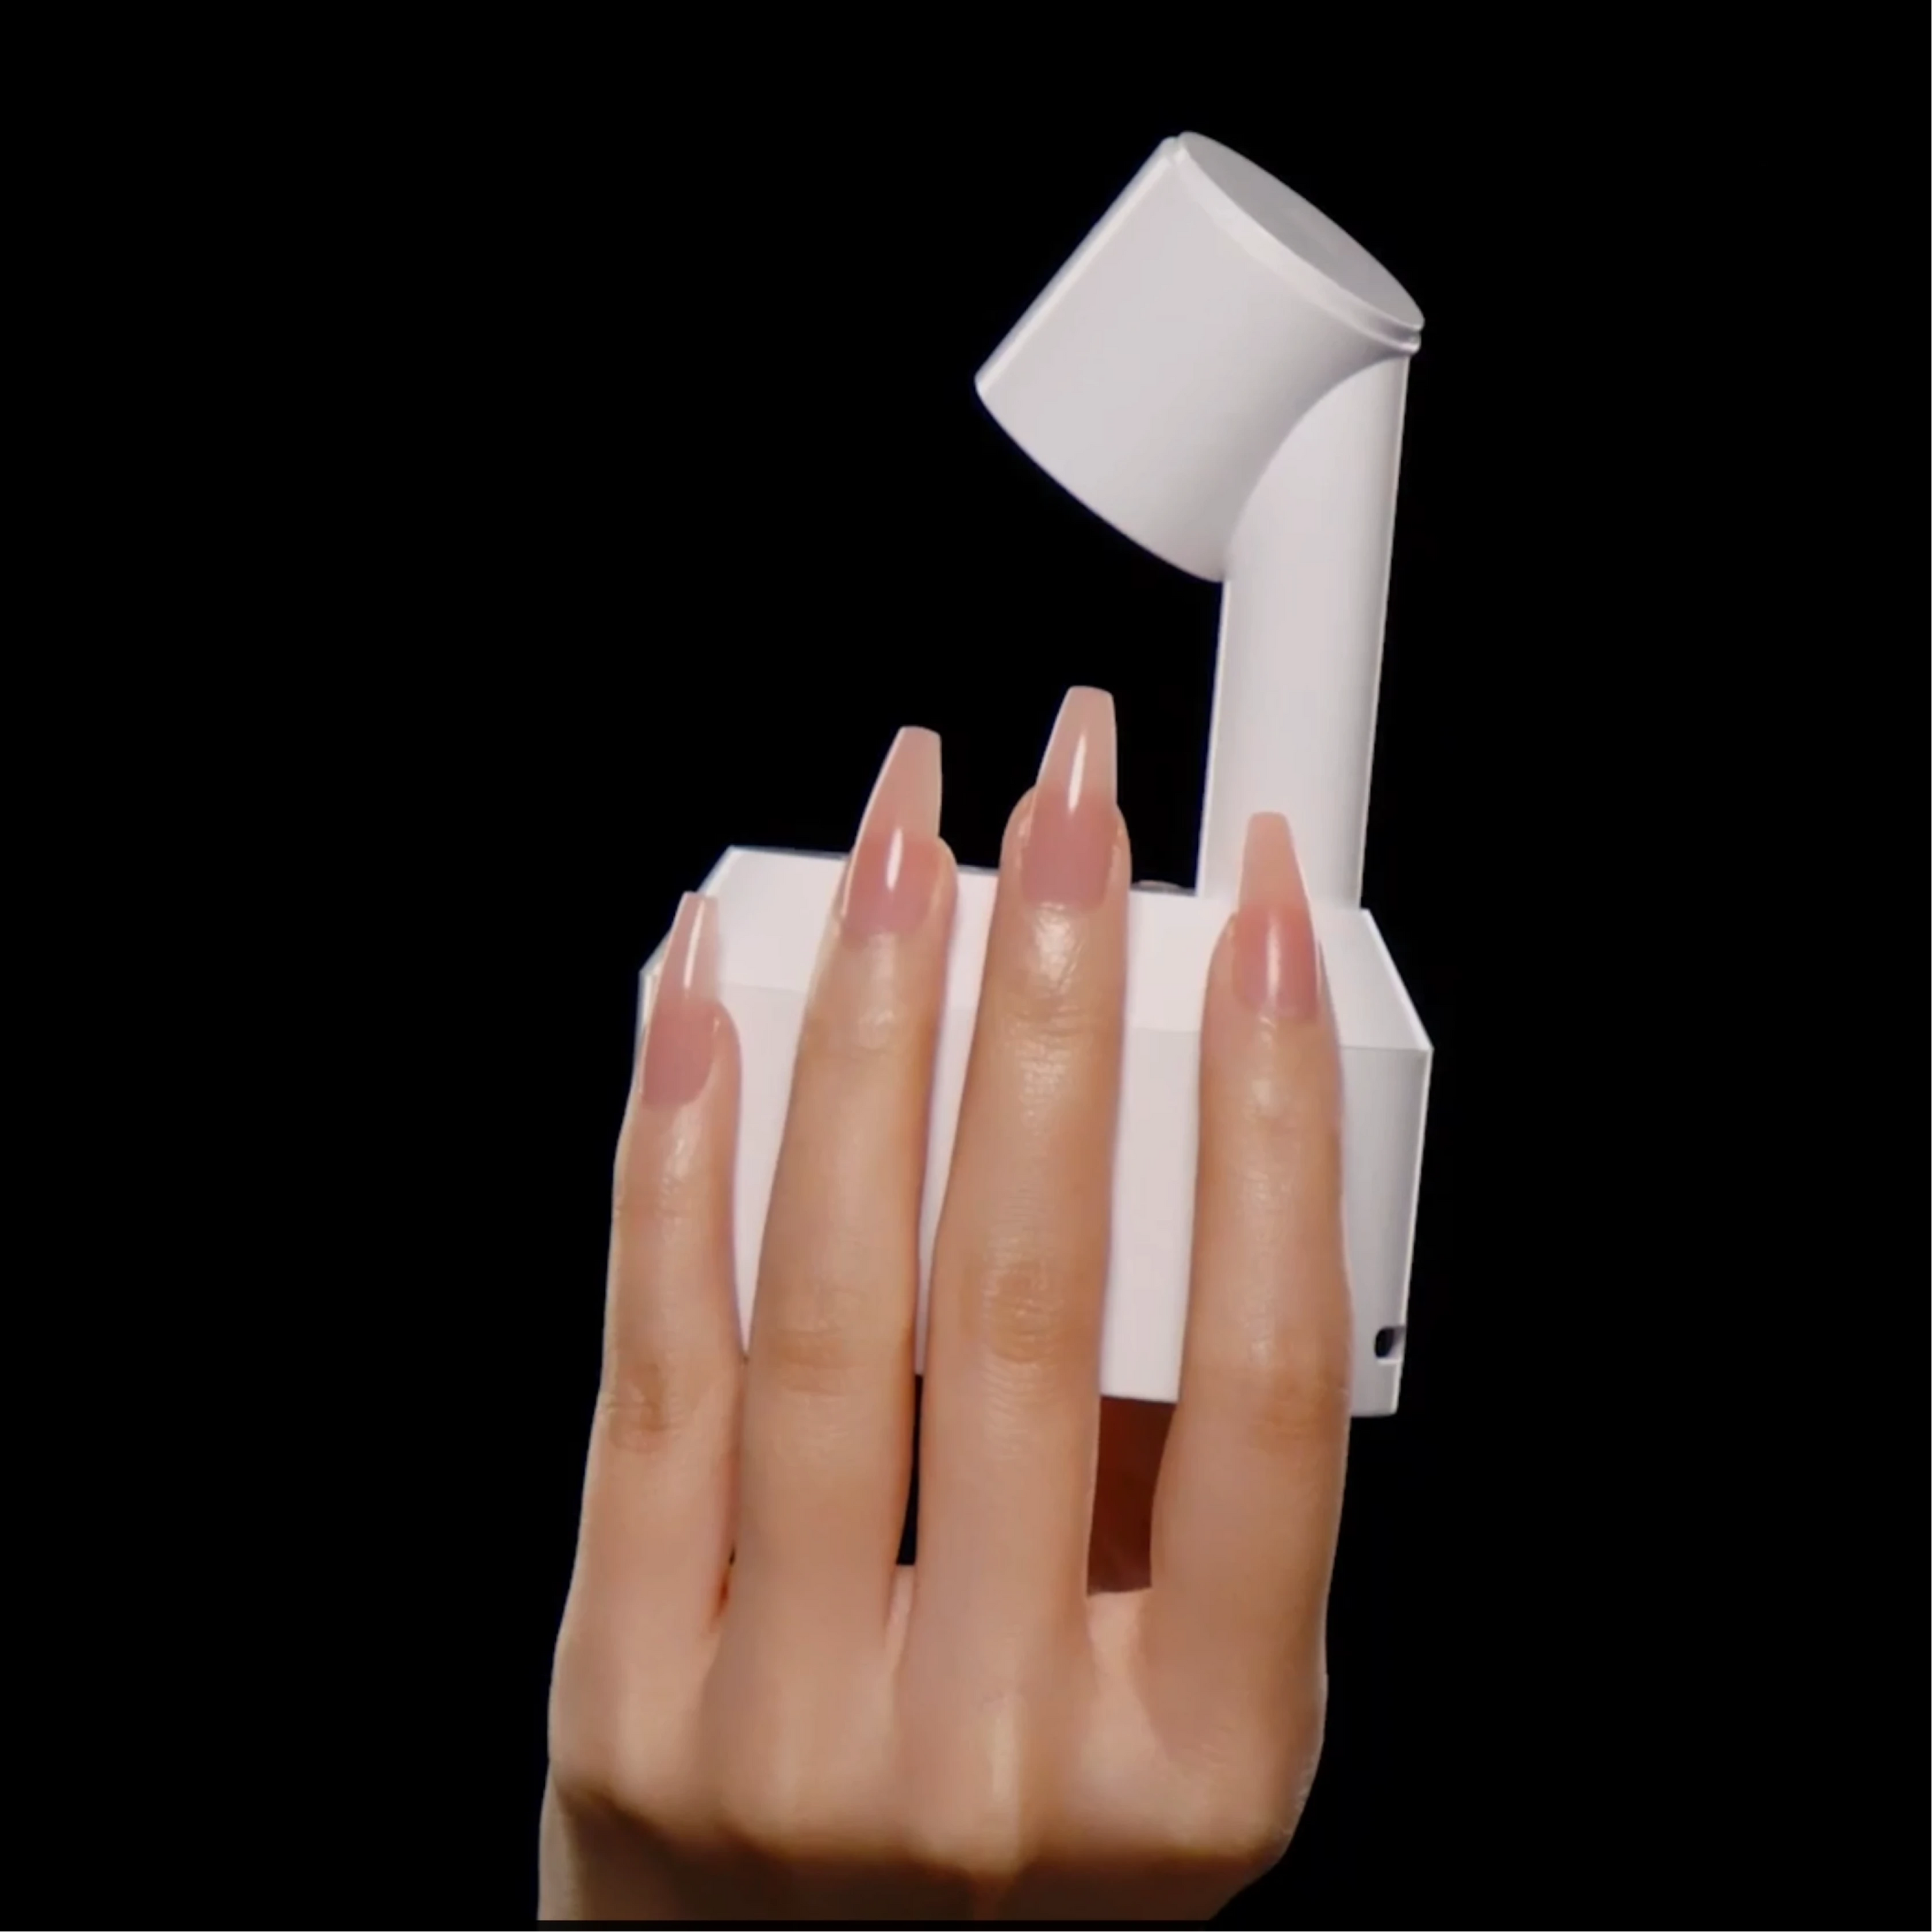
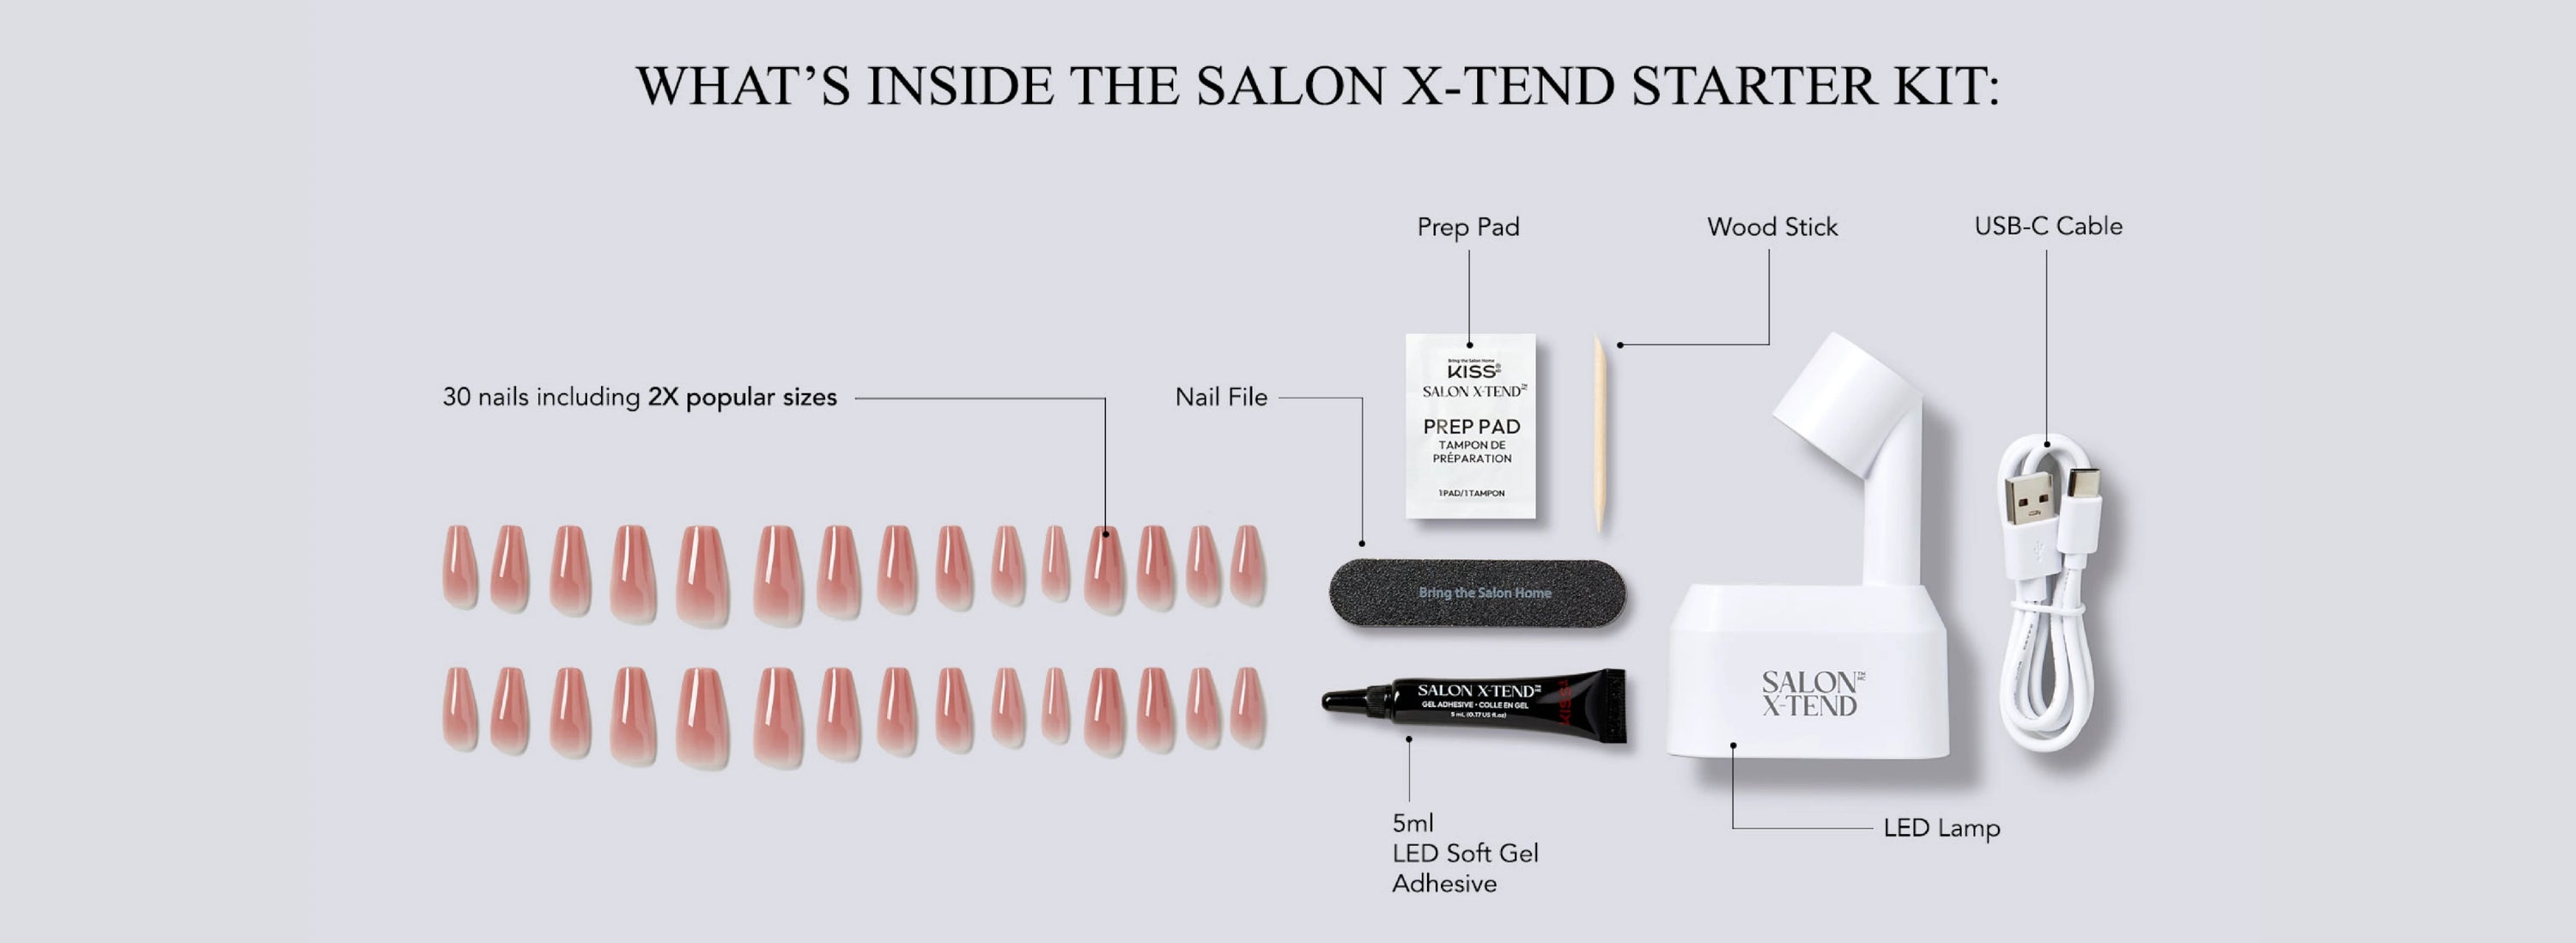
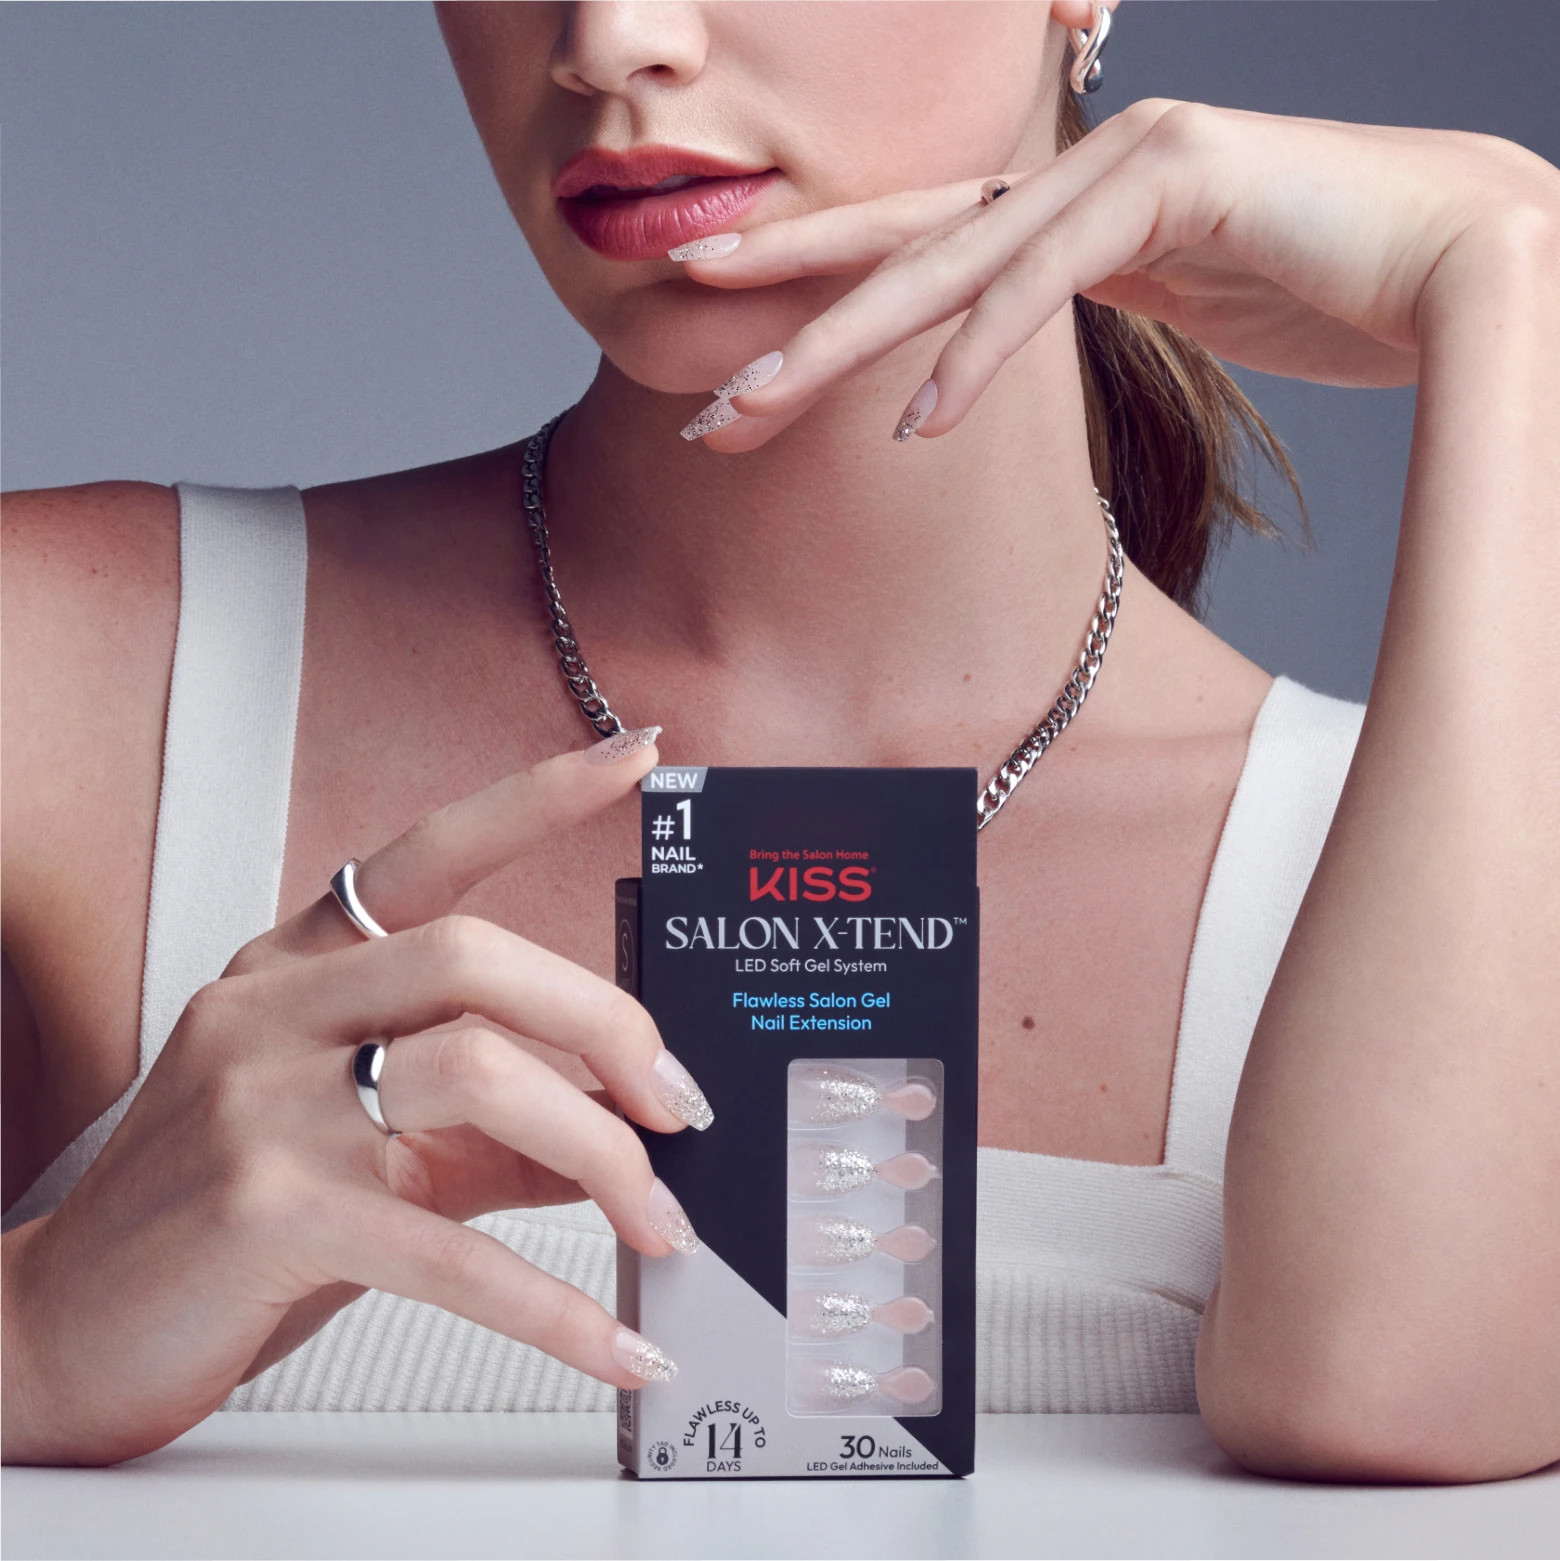
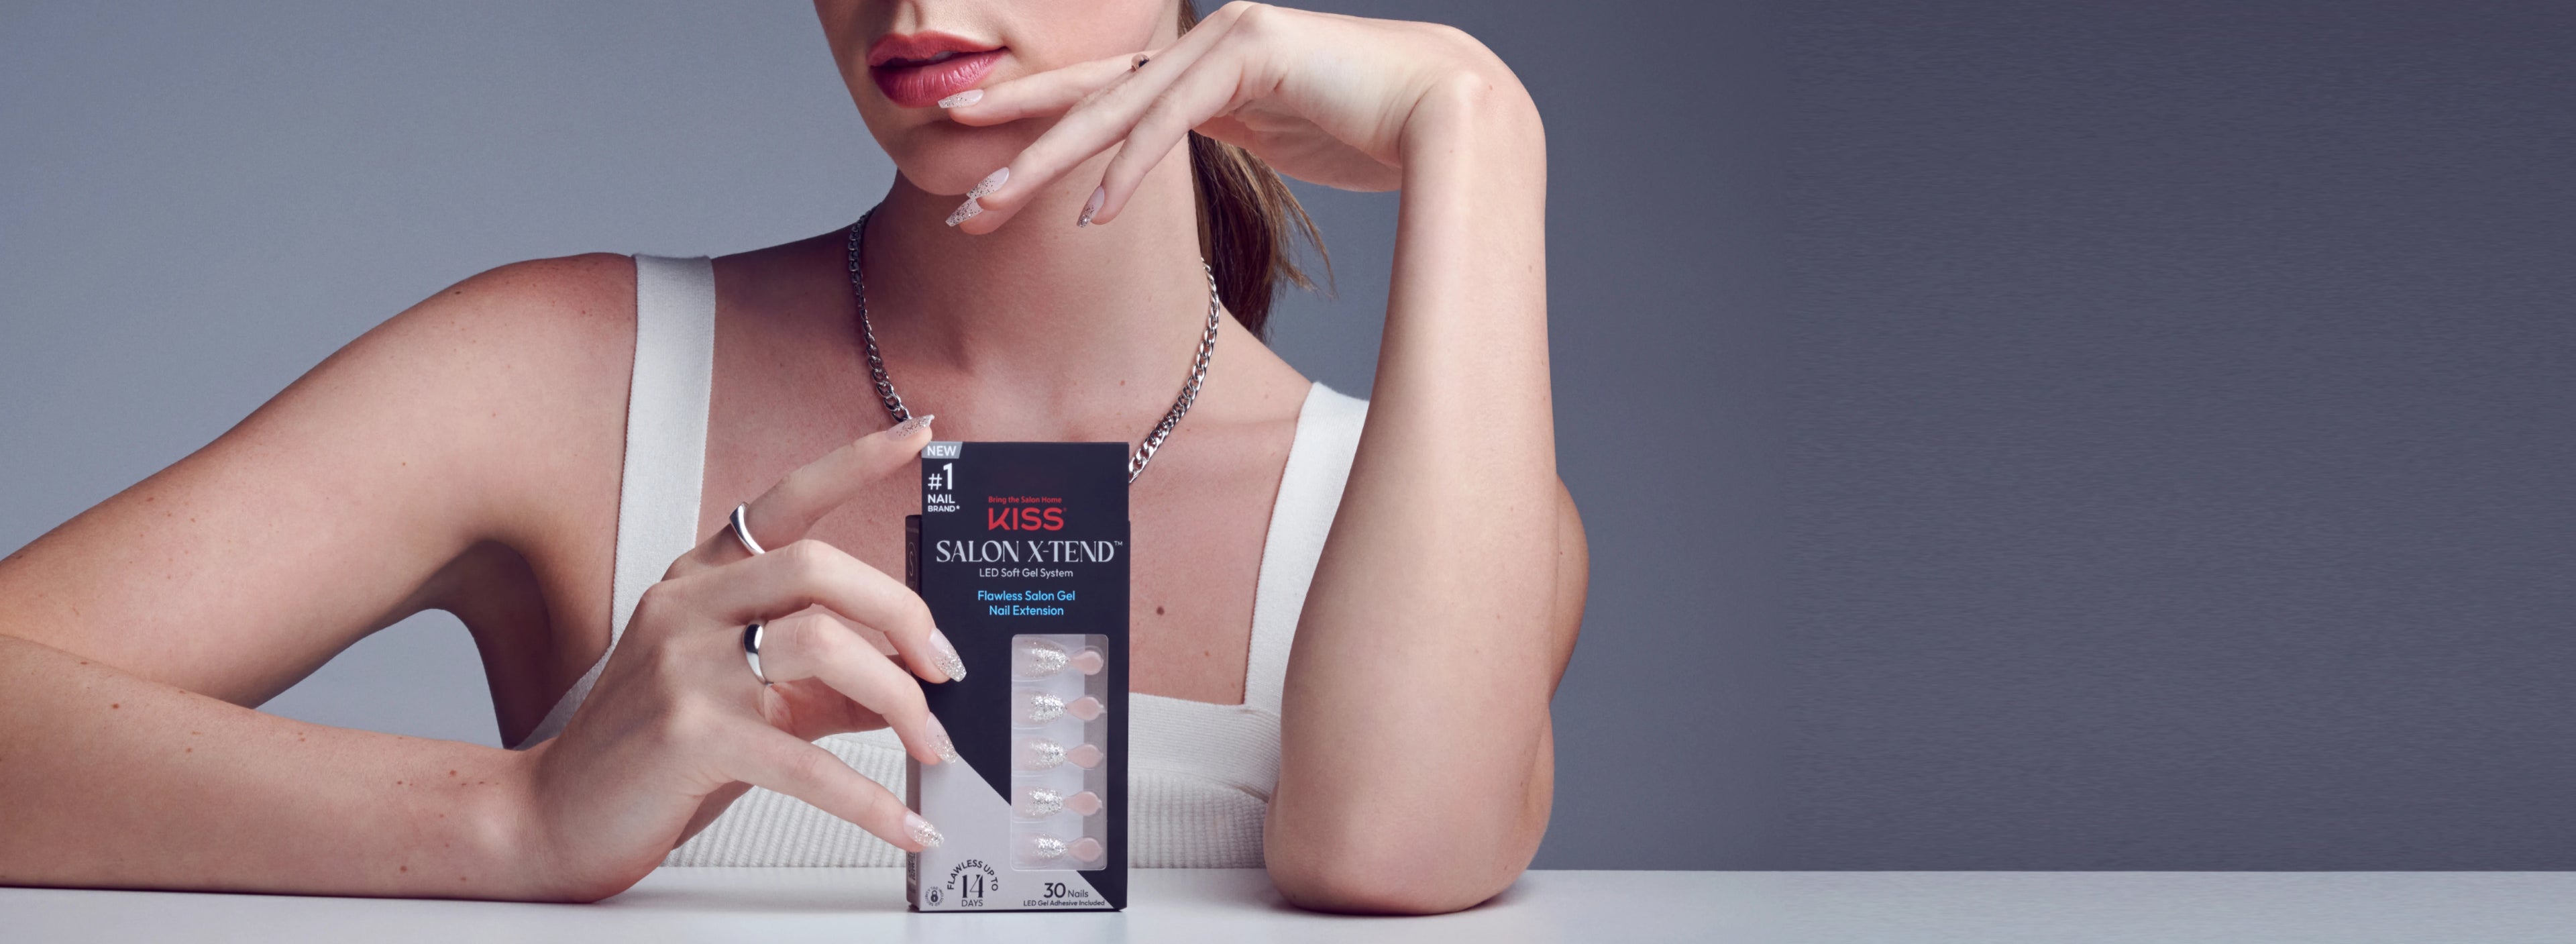
Salon X-tend LED Soft Gel System
| Starter Kit
Get flawless salon gel nail extensions at home with this LED soft gel system from KISS. Our innovative DIY curing system features an ergonomically designed LED lamp that provides a salon-level manicure that will stay flawless for up to 14 days.
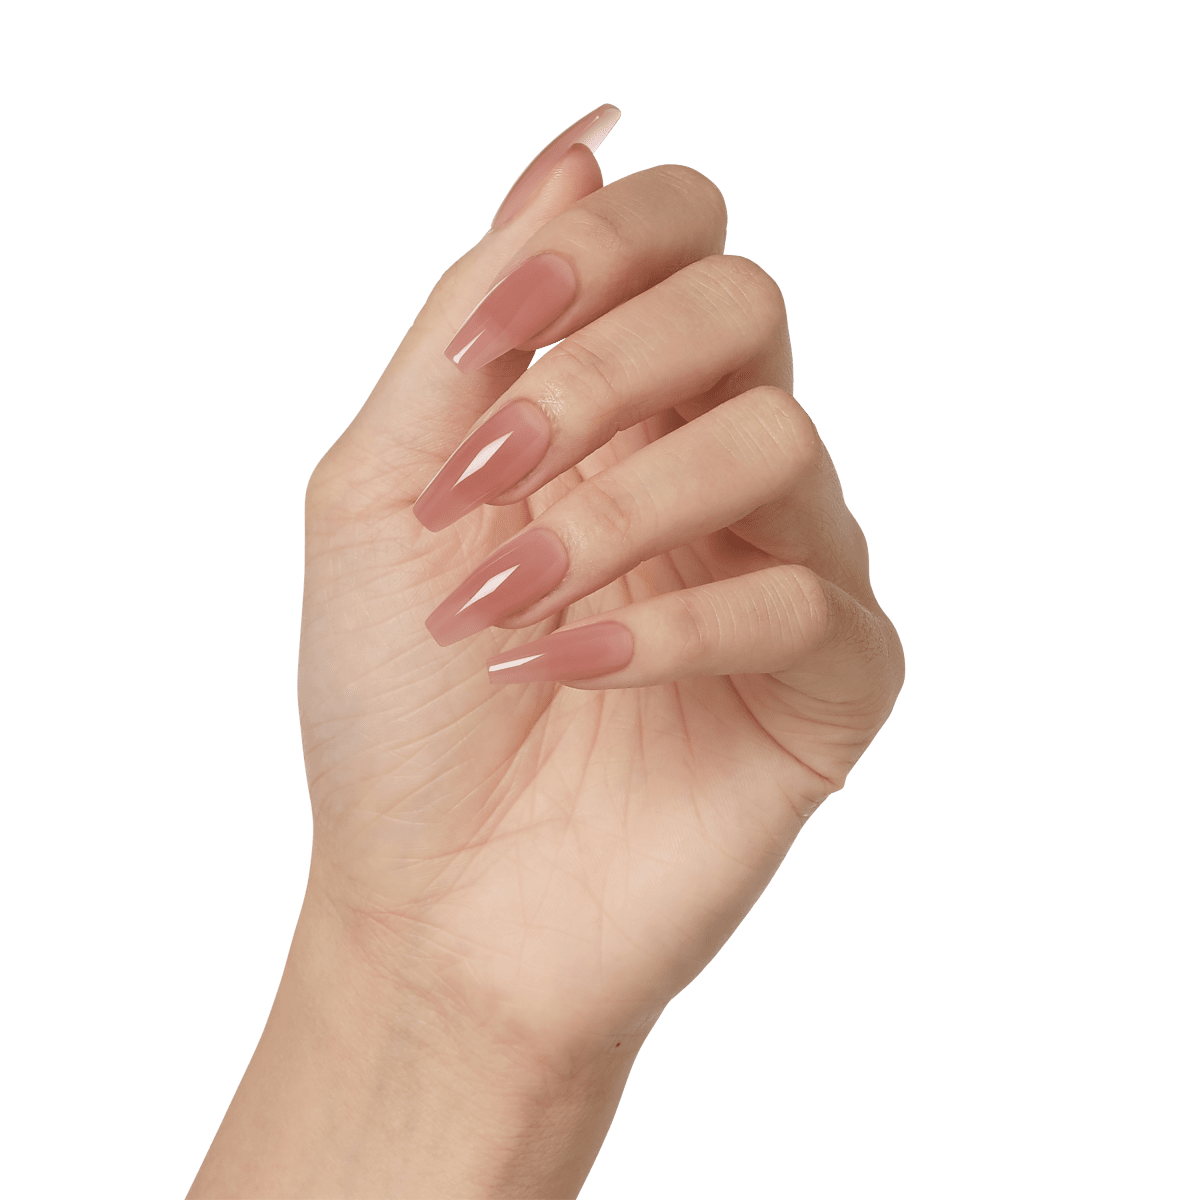
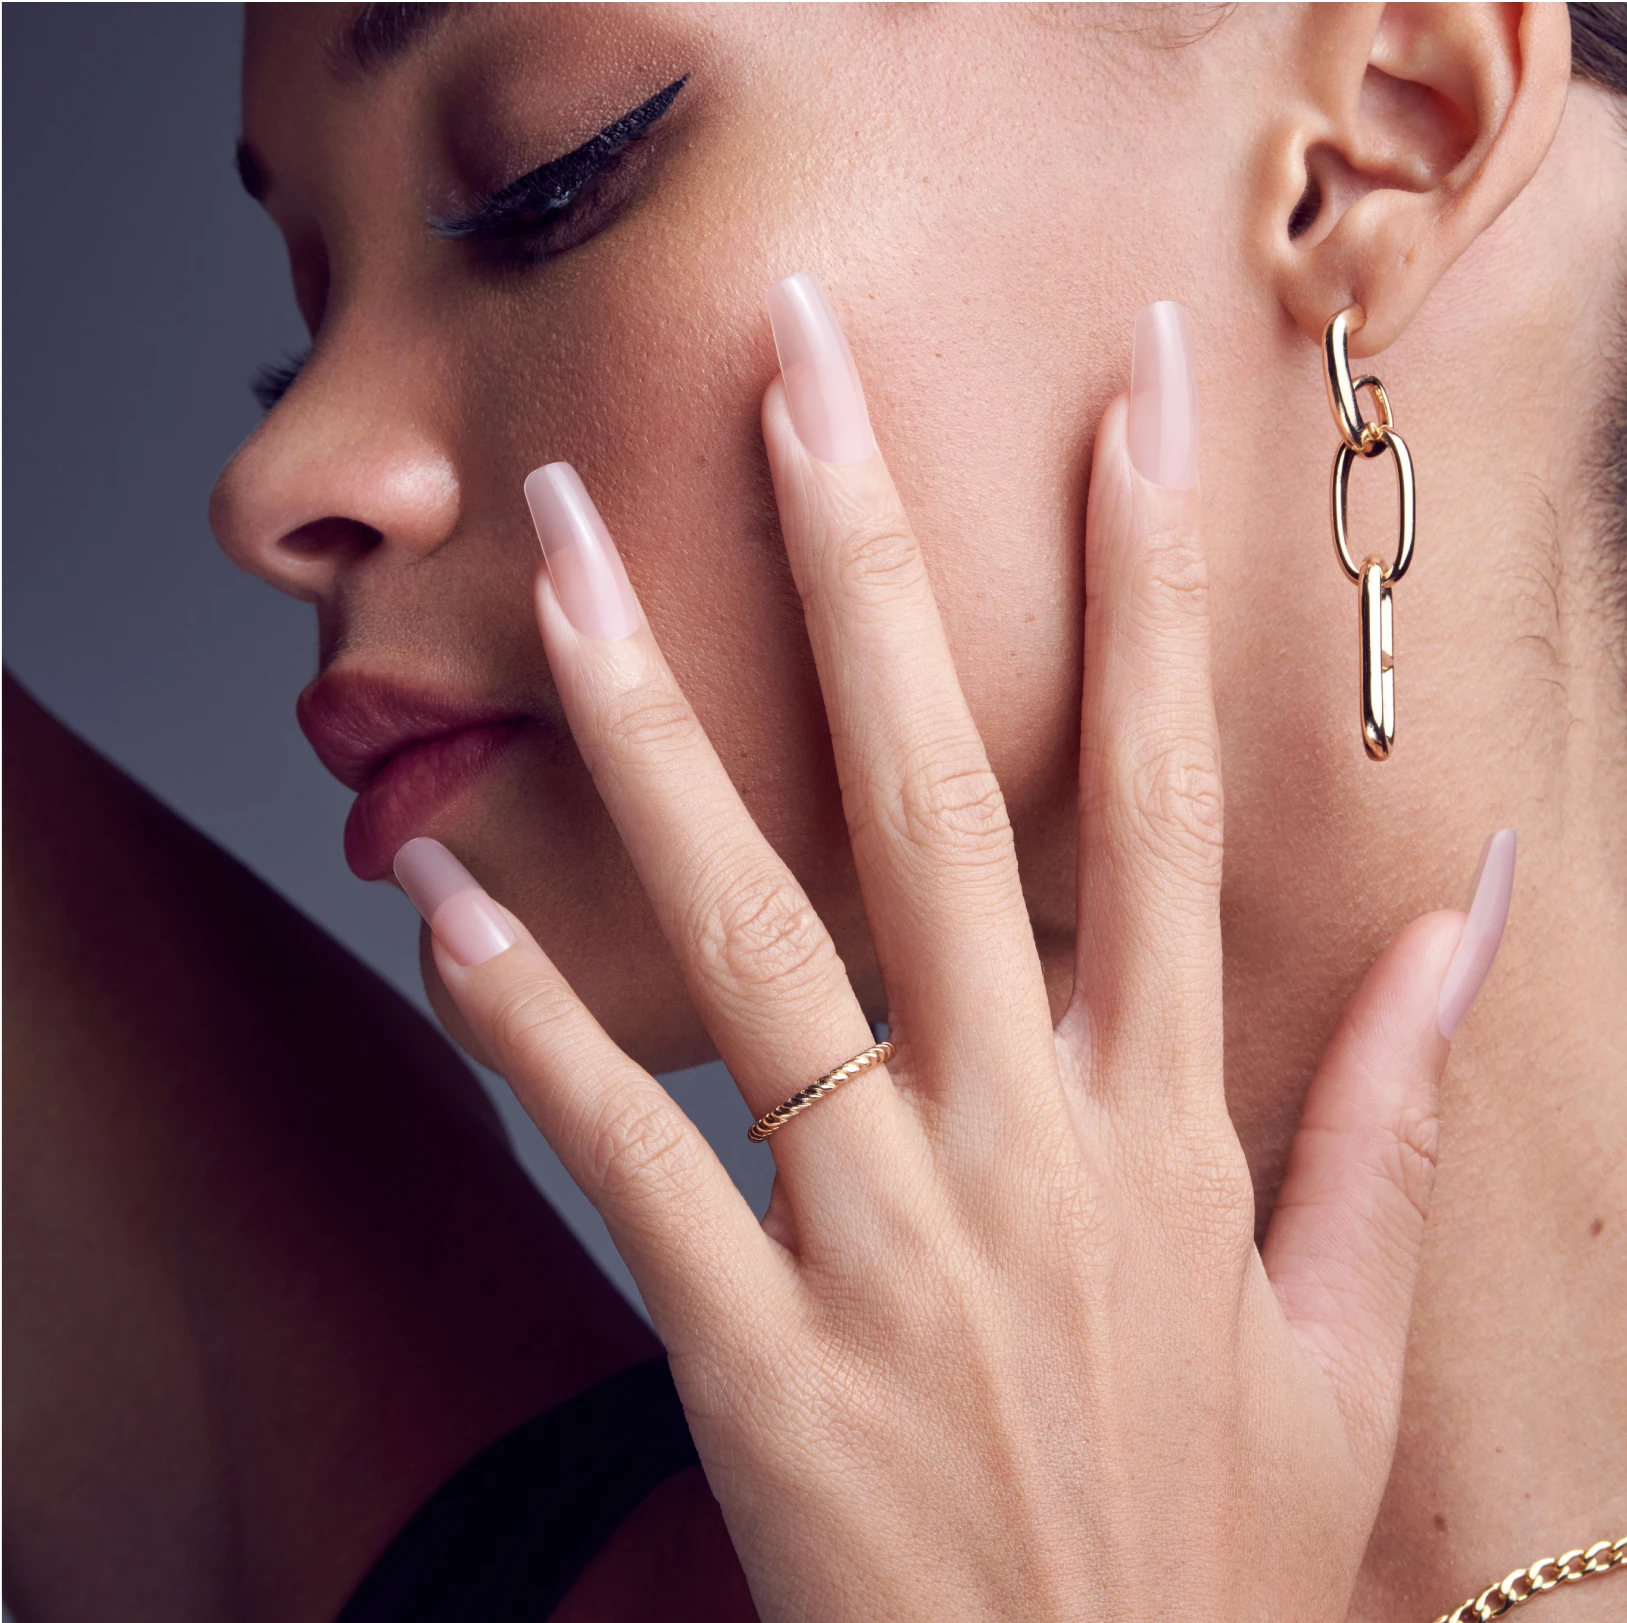
- Pink Coffin Press On Nails Long 30 Fake Nails with Nail Glue
- Bend resistant, superior strength with a natural, seamless look and fit
- Smart Touch Mini LED Lamp has a motion sensor and stable stand for pro-level curing
- Smart Touch Mini LED Lamp cures one finger at a time; for the fastest curing experience, use our Pro LED Lamp, sold separately
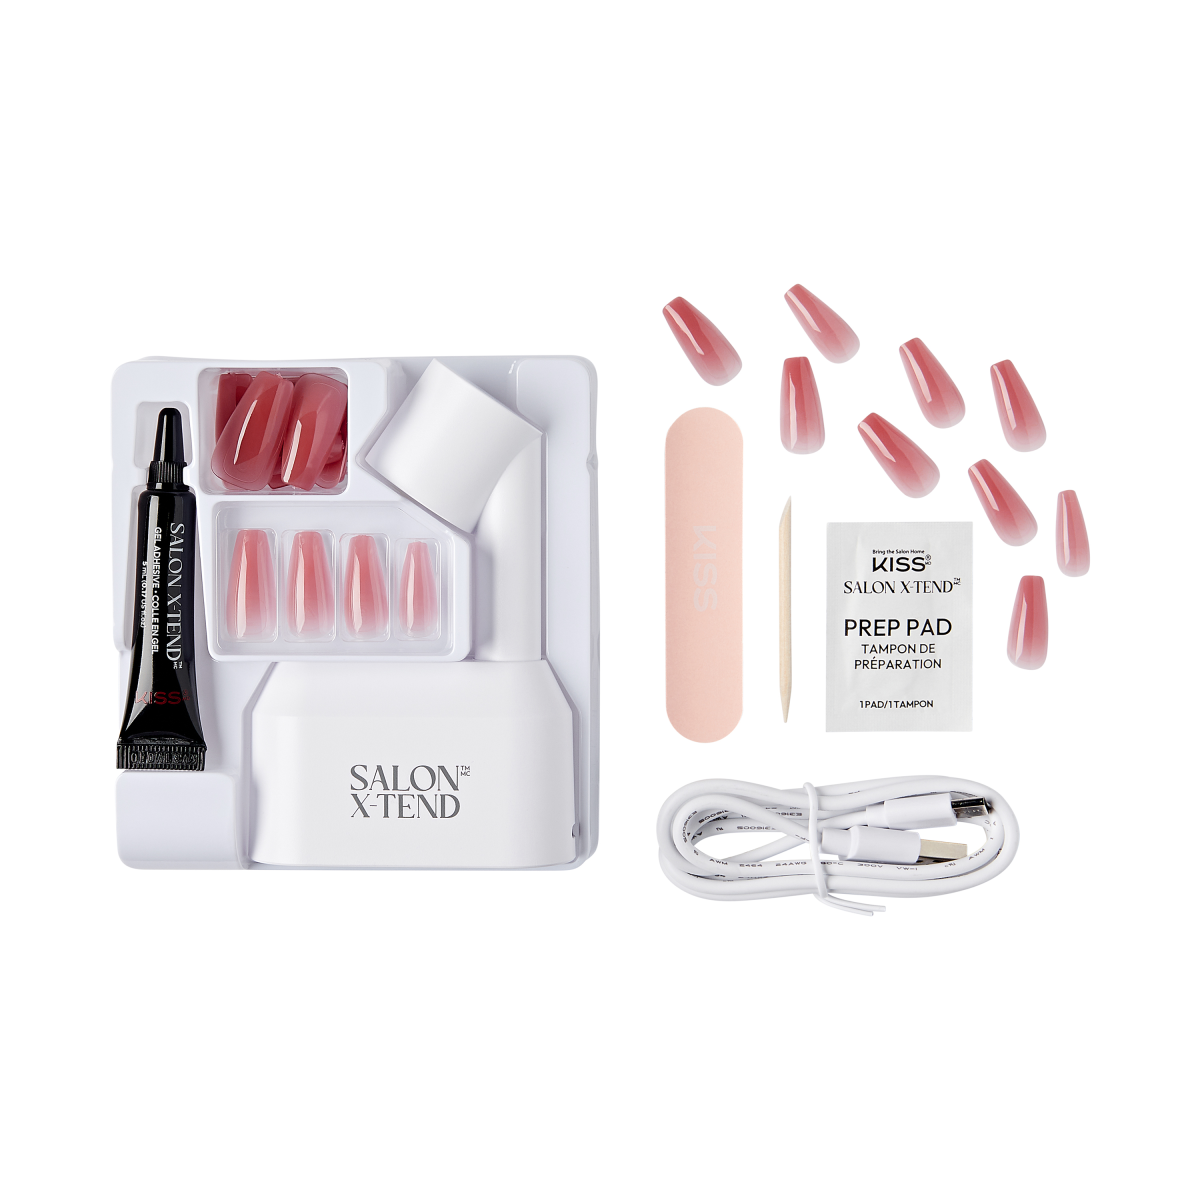
- LED Gel Nail Kit includes 30 Full Cover Press On Nails, LED Soft Gel Adhesive 5 ml (0.16 US fl. oz.), Smart Touch Mini LED Lamp, USB Cable, Prep Pad, Manicure Stick, & Mini Nail File
- Regular price
-
$23.99 - Regular price
-
- Sale price
-
$23.99
Shipping calculated at checkout.
Couldn't load pickup availability
Use & Tips
INGREDIENTS


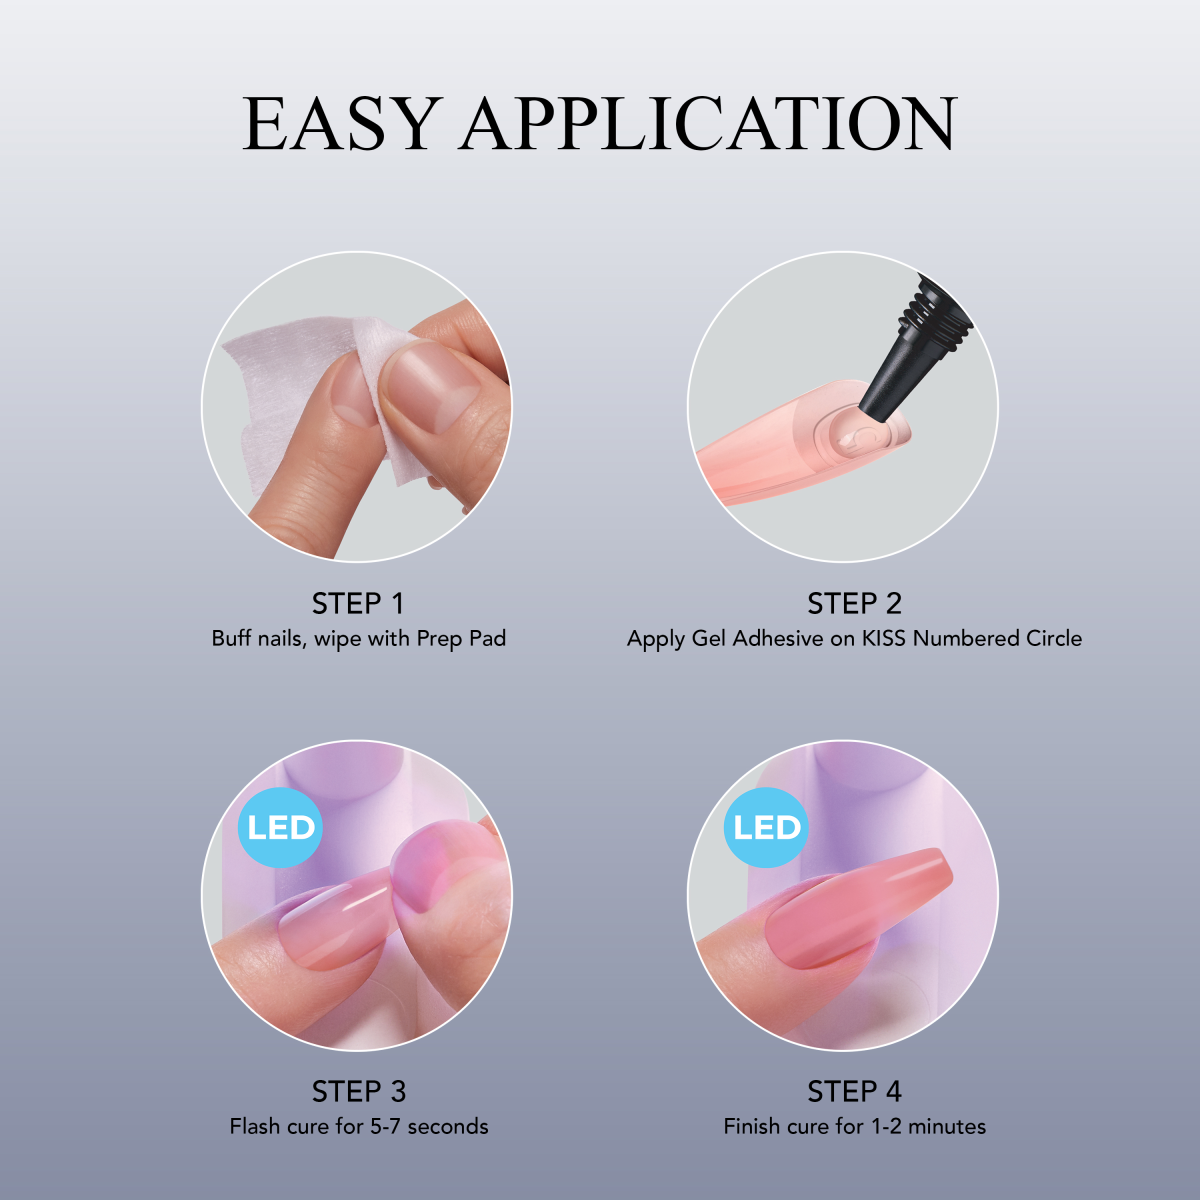


Easy Application
How To Apply

LED SOFT GEL NAILS
Frequently Asked Questions
Will KISS glue-on nails damage my natural nails?
No. KISS nails use a non-damaging adhesive. With easy application and hassle-free removal, there is no damage to natural nails.
How long do KISS nails last?
With proper application, you can expect your KISS nails to last up to 7 days.
How do I find my nail sizes?
Nail size number is embossed on the underside of each nail. Find the best nail fit for each finger, and set aside in order. If you are in between sizes, choose the smaller nail size.
How do I apply KISS nails?
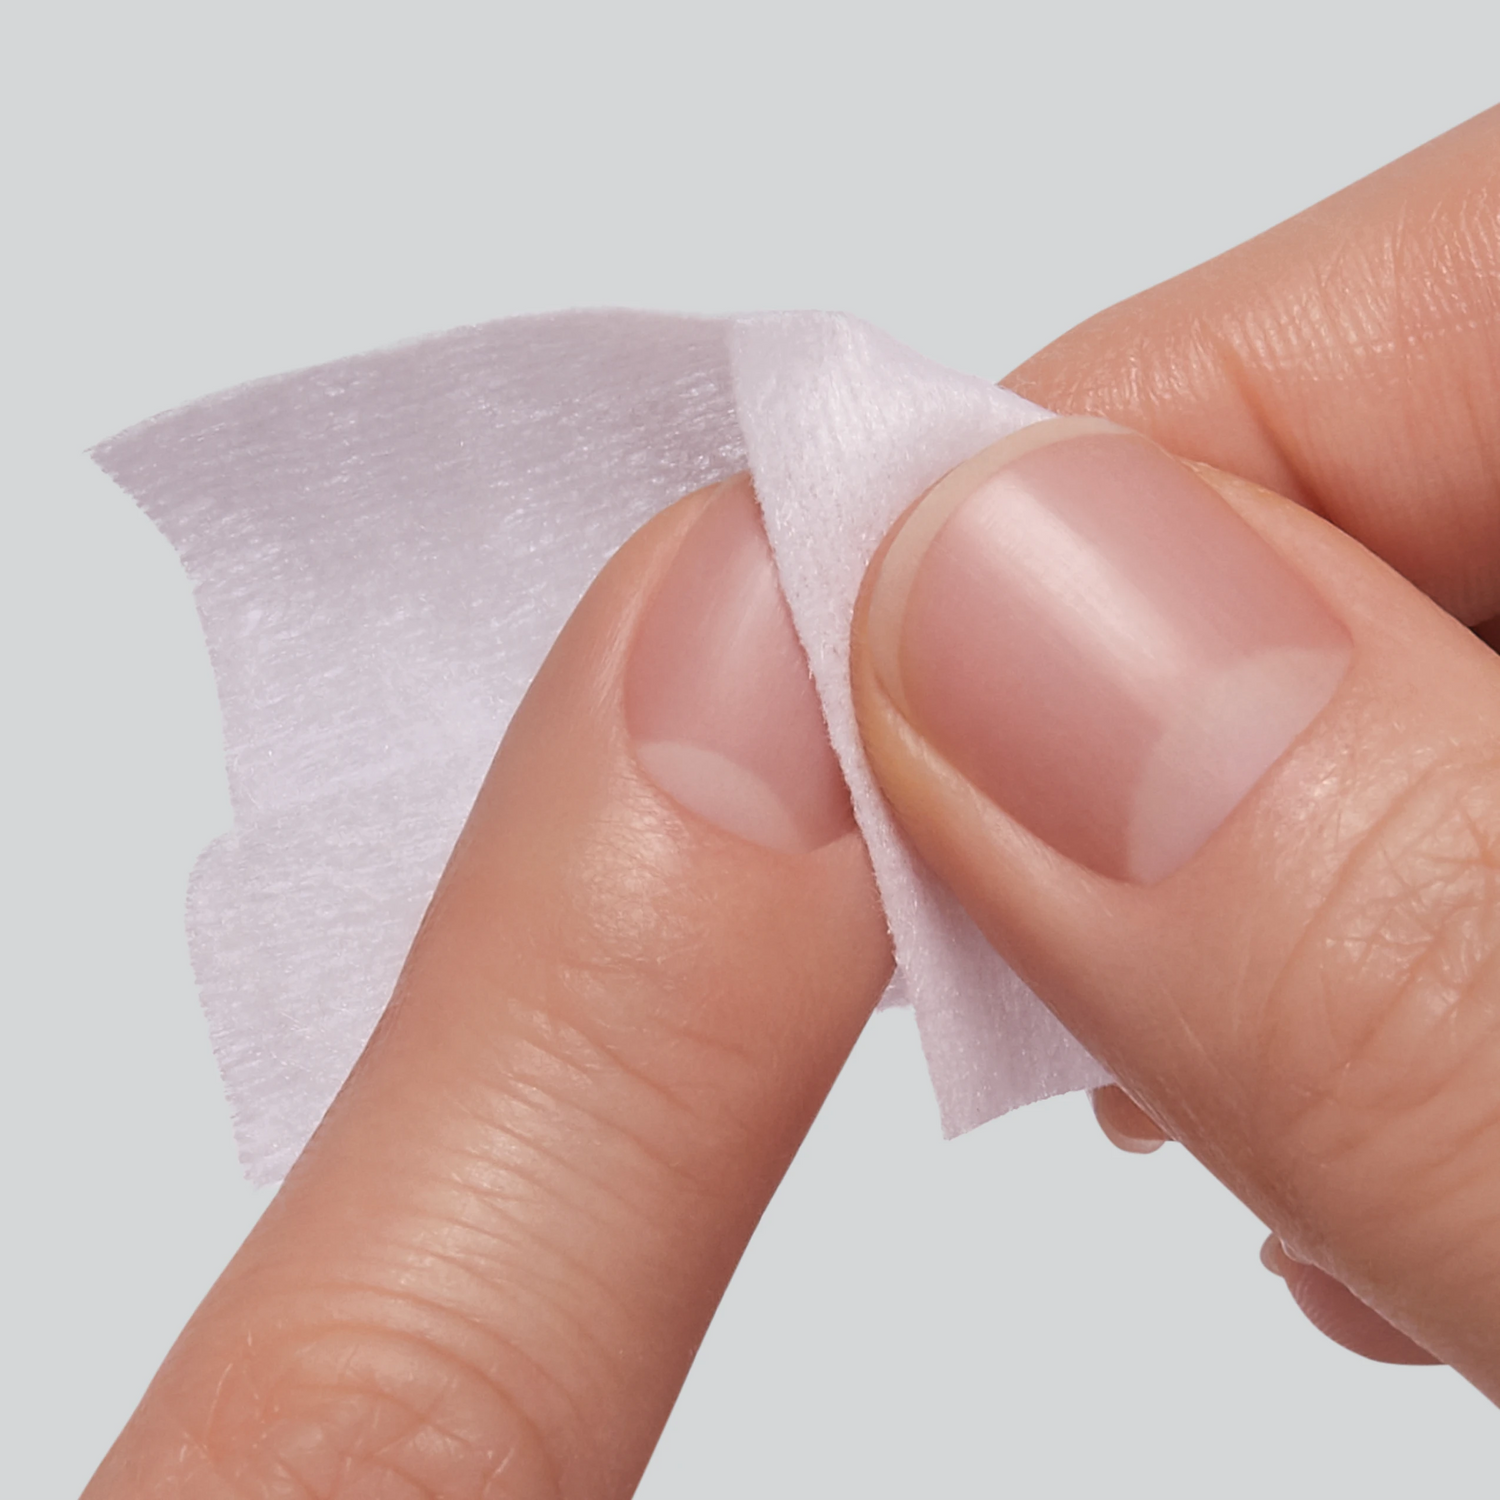
- Clean your own nails with nail polish remover or alcohol.
- Wash hands thoroughly with soap.
- Apply a thin layer of nail glue to the surface of your natural nail and the back of the KISS nail.
- Align each KISS nail starting at the cuticle and press down for 5 seconds to ensure proper adhesion.
Are KISS nails rewearable?
KISS Nails are designed for one time use only. KISS Majestic Nails can be reworn up to 3 times.